
Easy DIY Dog Bone Christmas Wreath

Published on December 12th, 2018
It’s the most wonderful time of the year, with Christmas less than two weeks away – woohoo!
I wanted an easy-to-make dog-themed decoration to hang up in my living room this year, so I decided to make a dog biscuit wreath to go on the wall.
This is a great Christmas craft project to make for your dog because they get to enjoy all of the yummy biscuits throughout the festive period!
How to make a dog biscuit wreath for Christmas
You will need…
- Large piece of thick cardboard (I used an old packaging box)
- Pencil
- Two sizes of circle to draw around (I used a dinner plate and side plate)
- Scissors or craft knife & cutting mat
- Green material
- Glue gun
- Ribbon in various colours
- 12-20 dog biscuits (depending on wreath size)
Xmas dog wreath tutorial
Step 1: Draw two circles
Draw a large and a small circle onto your cardboard, with the smaller one inside the large one.
I used a dinner plate and smaller side plate to draw around to ensure perfect circle shapes.
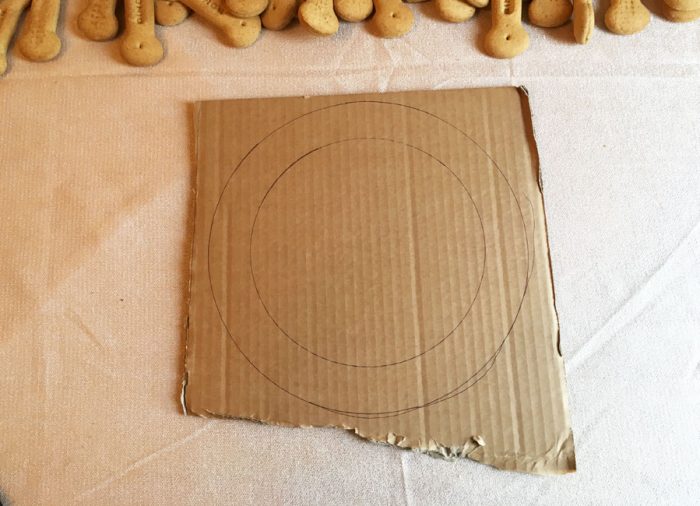
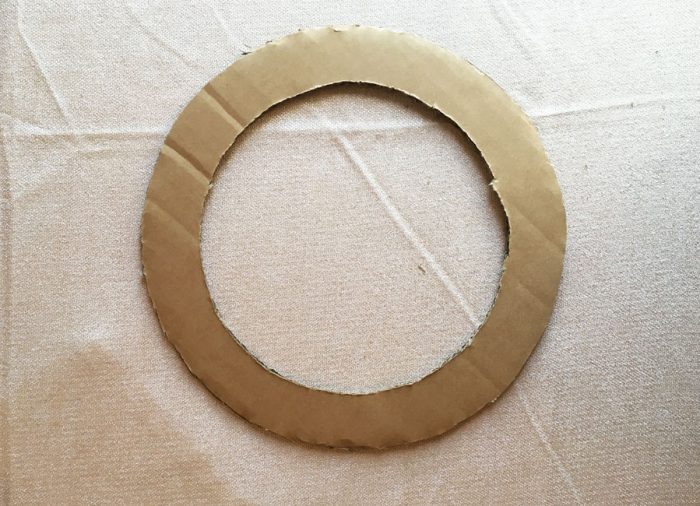
Step 2: Cut out the shape
Cut out the circle shapes to create the base for your wreath.
I started with scissors but they couldn’t easily cut through the thick cardboard.
In the end I used a small serrated kitchen knife to cut the cardboard. I did the cutting on a piece of old packaging foam so that the knife didn’t damage my work surface.
Don’t worry about making your cutout completely perfect – the next step will hide any jagged edges or mistakes in your cutting.
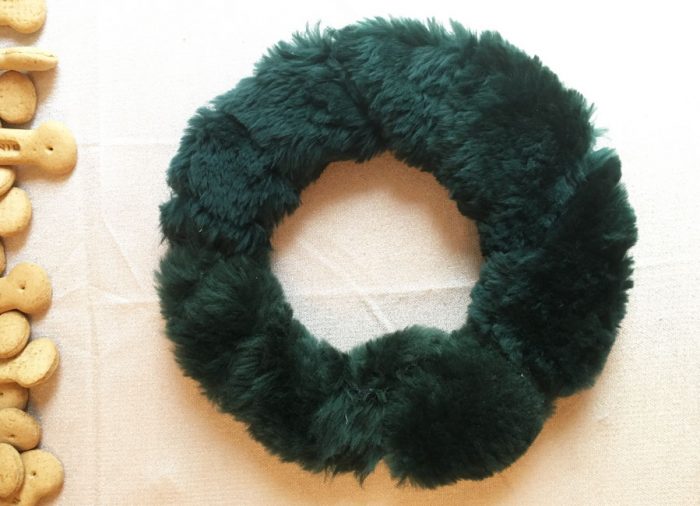
Step 3: Add green material
Cut strips of green material and wind them around your cardboard circle, using a glue gun to stick the material to the cardboard.
I used some green fluffy material that I managed to find in my local ScrapStore.
The thicker the material you use, the more “padded” your wreath will look when it is finished.
If you can’t find any green material then you could paint the cardboard green instead, although this means you will end up with a flat-looking wreath.
Step 4: Attach the dog biscuits
Use lengths of ribbon to tie the dog biscuits to the wreath.
It took me a while to figure out the best way to do this to fit the most biscuits onto the wreath.
You want to make sure the ribbon holds the biscuits securely so that they don’t fall off.
I started out by tying neat bows like this:

However, because of the angle of the circular wreath, this caused the biscuits to angle themselves inwards which made it difficult to add the next one as they kept moving into each other and forcing them out of position.
A better way to tie the biscuits to your Christmas wreath is to loop the ribbon around them twice and form a cross shape, then simple tie off the ribbon.
The cross means that the biscuit is supported from both sides, so it doesn’t angle inwards and disrupt the other biscuits.
This method of tying the ribbon also makes a prettier wreath as you see more of the ribbon!

Step 5: Add hanging ribbon
Leave a small gap at the top of your wreath to loop some ribbon around and tie into a knot so that you can hang the wreath up.
Bear in mind that it may be heavy based on how many dog biscuits you have added, and the weight of the material you have used.
Congratulations – your DIY dog biscuit wreath is now ready for you to decorate your house for Christmas!
I recommend hanging it out of reach of your dogs – otherwise the temptation may prove too much!
My dogs are enjoying a biscuit a day from the wreath. Simply untie them one at a time to remove them and give your dog a Christmas treat.
Although – as I am a mean dog mum and want my wreath to last longer, I am breaking the biscuits in half and making my two shih-tzus share.
Socks doesn’t seem too happy about having to share! 😀